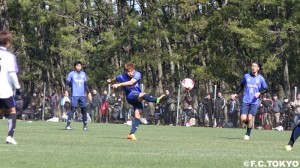
Today (2/12), a practice match was held between Sanfrecce Hiroshima and Tokyo at Seagaia Event Square 1 from 11:30. (45 minutes x 2)
Tokyo, with its unique style, actively tried to steal the ball and control the game, challenging the highly polished Hiroshima.
10 minutes, Takahagi expands to the right from Muroya's heading clear. Nagai broke through and sent a cross, but Nakajima, who closed in from the far side, couldn't convert the shot.
At 18 minutes, Yoshito OKUBO, Higashi, and Taika NAKASHIMA fought hard in the left area just in front, and earned a free kick. Kiyoshi OTA aimed directly for it, but was blocked by the defense wall.
Despite gradually losing control to Hiroshima, various attempts are made.
Hiroshima faced several scenes where they were shot from wide developments and also received sharp counters multiple times, but they showed no defensive flaws centered around Hayashi and kept a clean sheet, ending the first half with no goals conceded.
Hashimoto entered as a defensive midfielder and approached the second half with a focus on pass speed and tempo of moving the ball.
Gradually grasping the rhythm, the scenes of approaching the Hiroshima goal increased.
In the 17th minute, Tanihata was substituted for Higashi as a defensive midfielder. They tried to line up Takahagi and play him as an attacking midfielder.
Maeda entered the field at the 35th minute when the team started to grasp the rhythm and create more opportunities to approach Hiroshima's goal.
Substitute Nagai with Tokunaga in the 42nd minute, and switch to a 3-4-3 formation.
DF are Tokunaga, Maruyama, Morishige. In the shadow are Takahagi and Nakajima. Formation of one top Maeda.
Both teams attacked until the end, but neither team was able to score, and the match ended in a goalless draw.
The results of the practice match can be found here
【Score】FC Tokyo 0-0 Sanfrecce Hiroshima

|


